Electronics Production
1 - Define our PCB production process. (Group Assignement)
2 - Make my own programmer:
This week, the individual assignement is to make an In-circuit Programmer by milling, stuffing, programming & test it.
I have the choice betwin a lot of different ready to made programmer made by the Fabacademy pryors years student.
After checking all the choise, I select "the FabOptimus" by Ali.
I dowload the Traces & Outline png,
vectorize & save it on SVG, and launch the CNC soft.
I setup the tool i want to use (the 1/32' & the 1/64' flat-end mill), and the soft show me the drill can't pass everywhere.

Go fix it ^^
let's go fix that probleme & let's discovred Eagle a Electronic Design Automation (EDA) Software. (Ali have link the Eagle board & schematics Thxs ^^)
After watching some Eagle tuto & with the help of Alban i find how to manage my way on my EDA trip.
I dowload & set the DRC (Design Rule Check) from the CNC we use, now i could place the traces whith a automatic cleareance need by the CNC.
In the move i decide to add Two LED for the state of the card.
My eagle files here : Shematic & Board
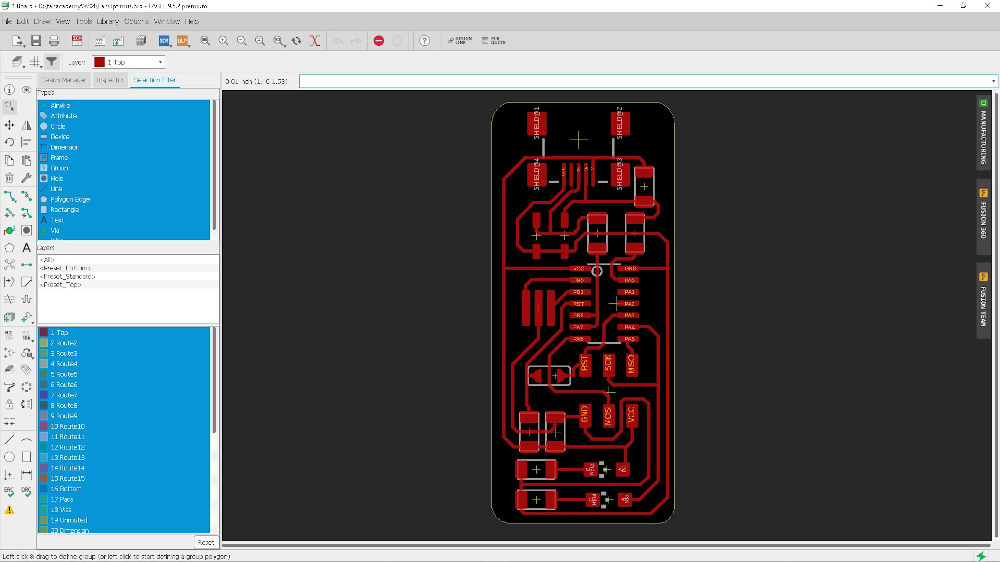
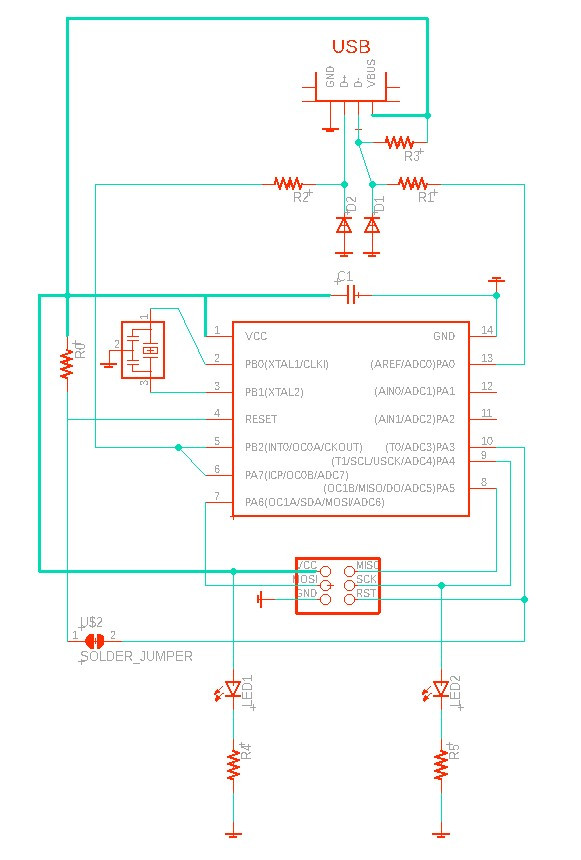

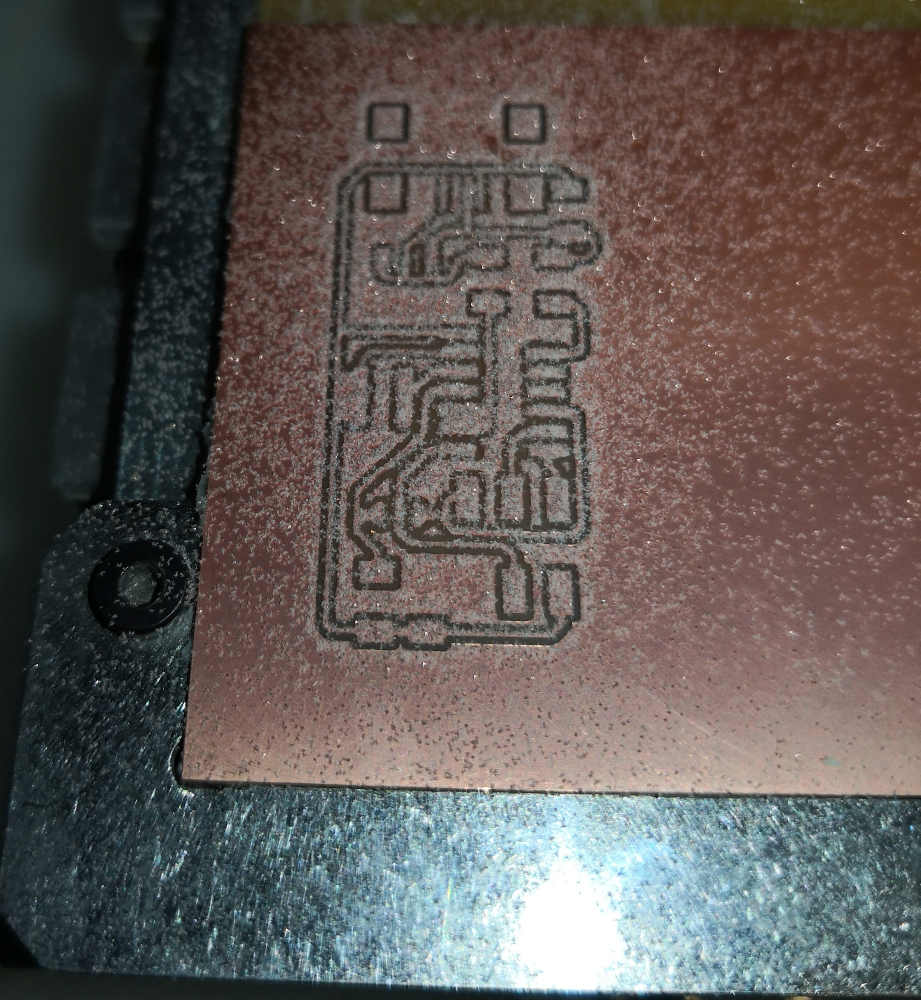
The Desktop Cnc we use is very pleasant, i could directly import a .BRD for milling.
After that try the "Cold Tin treatment" for make my Soldering more Easy.
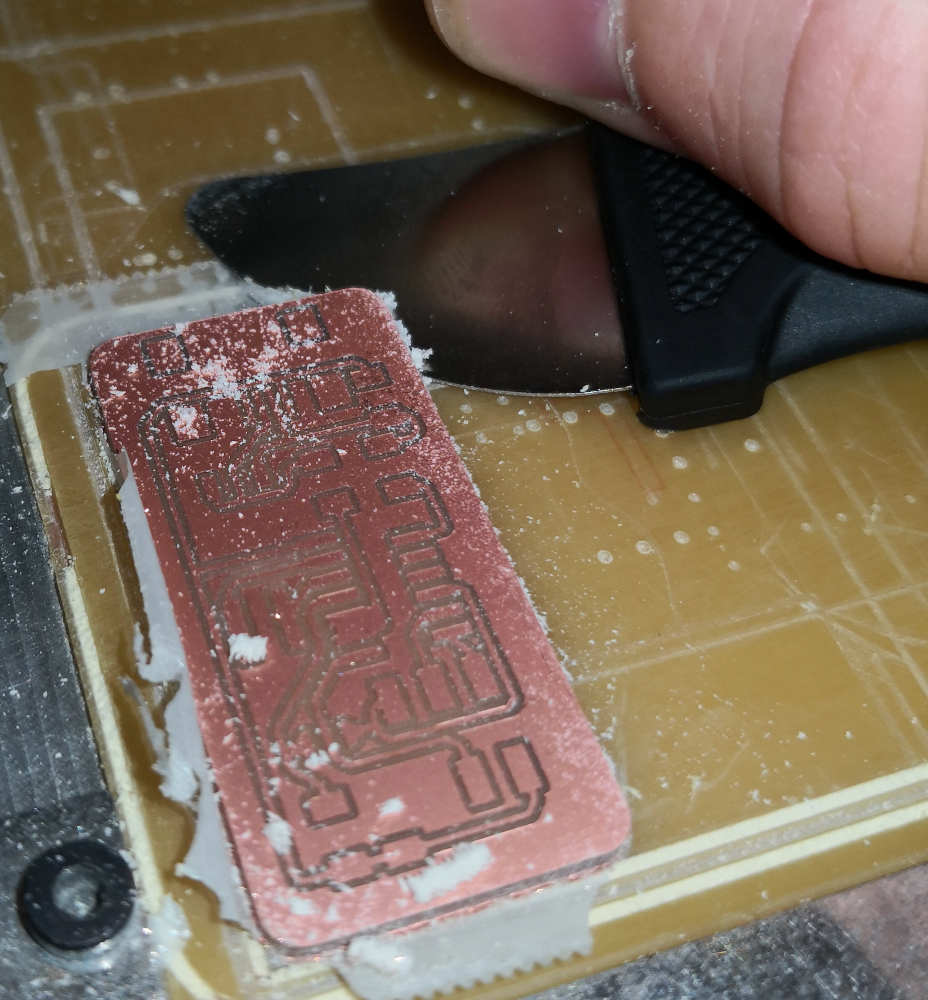
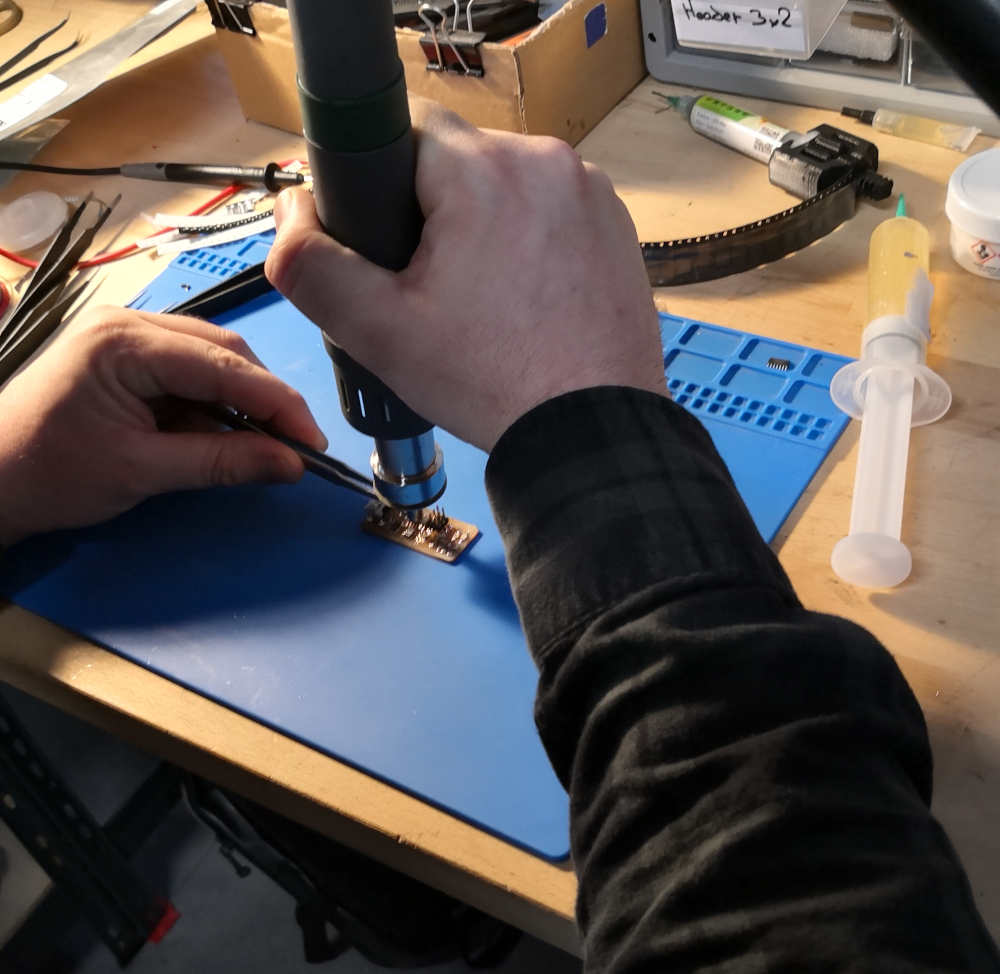
Soldering
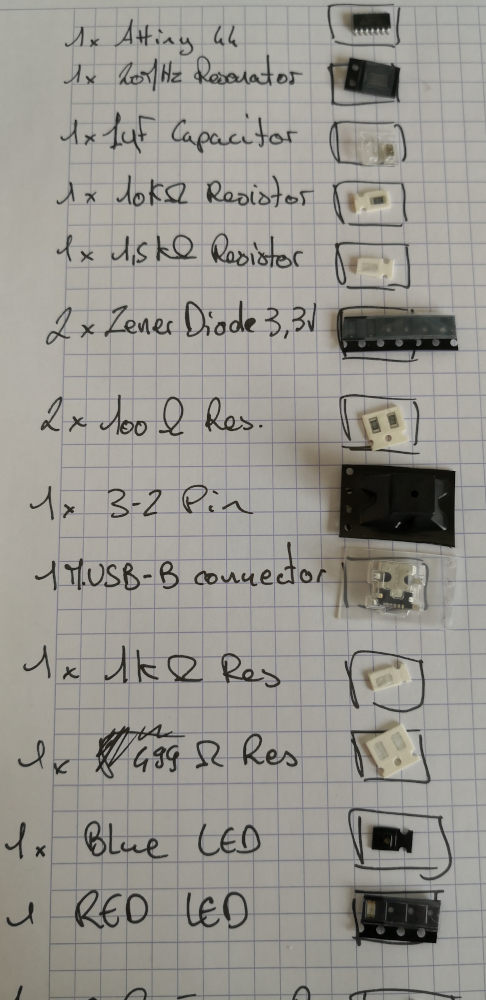
Before soldering, i prepare my composant. I write all i need on a sheet and pick up fom the drawer.
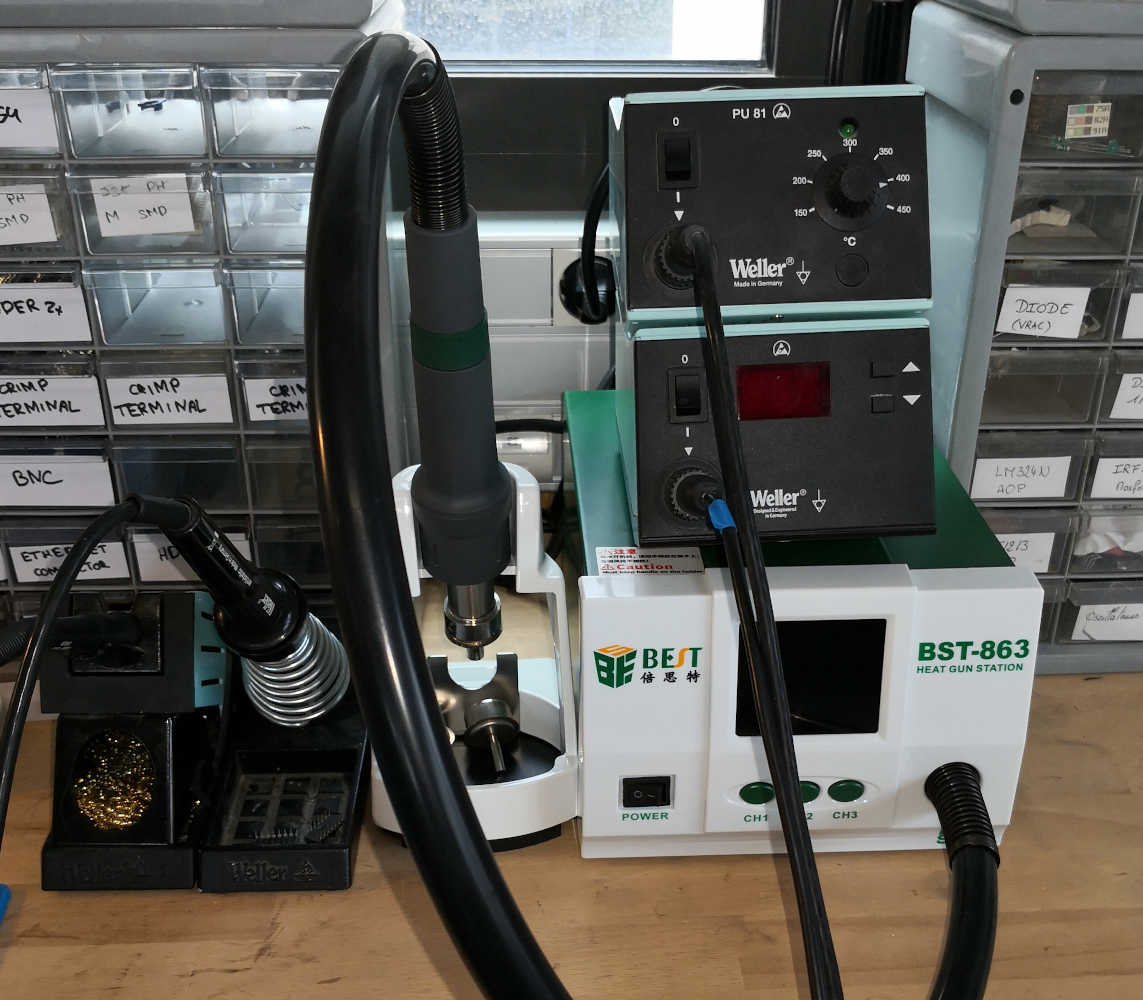
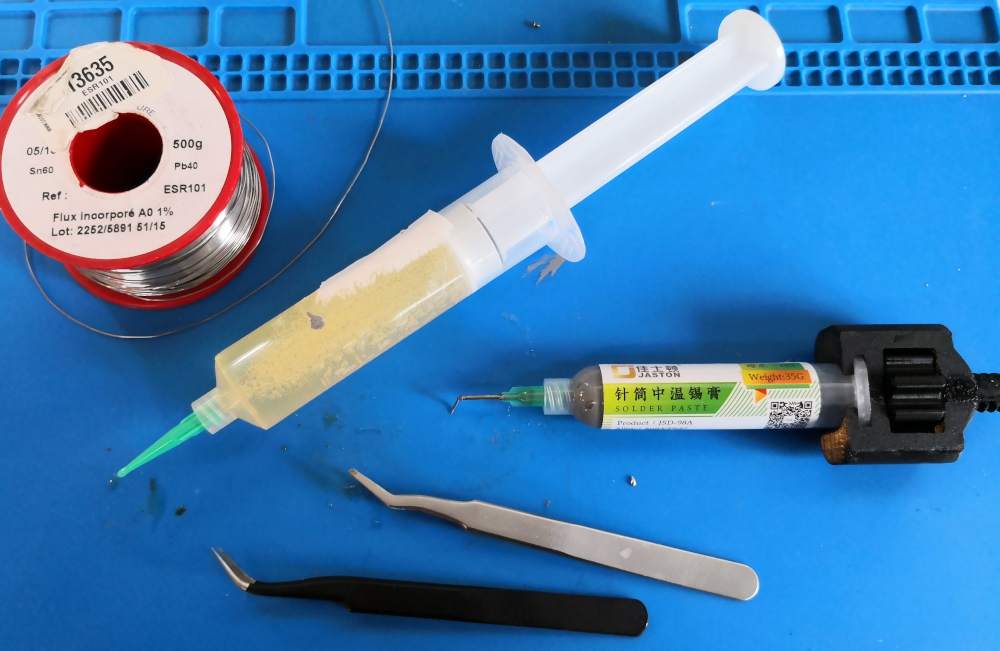
The solder station is compose by 2 Weller iron, each one with a different tip, & a hot air gun station.
Everything i need is here (flux, tin, solding paste, tool....) let's go.
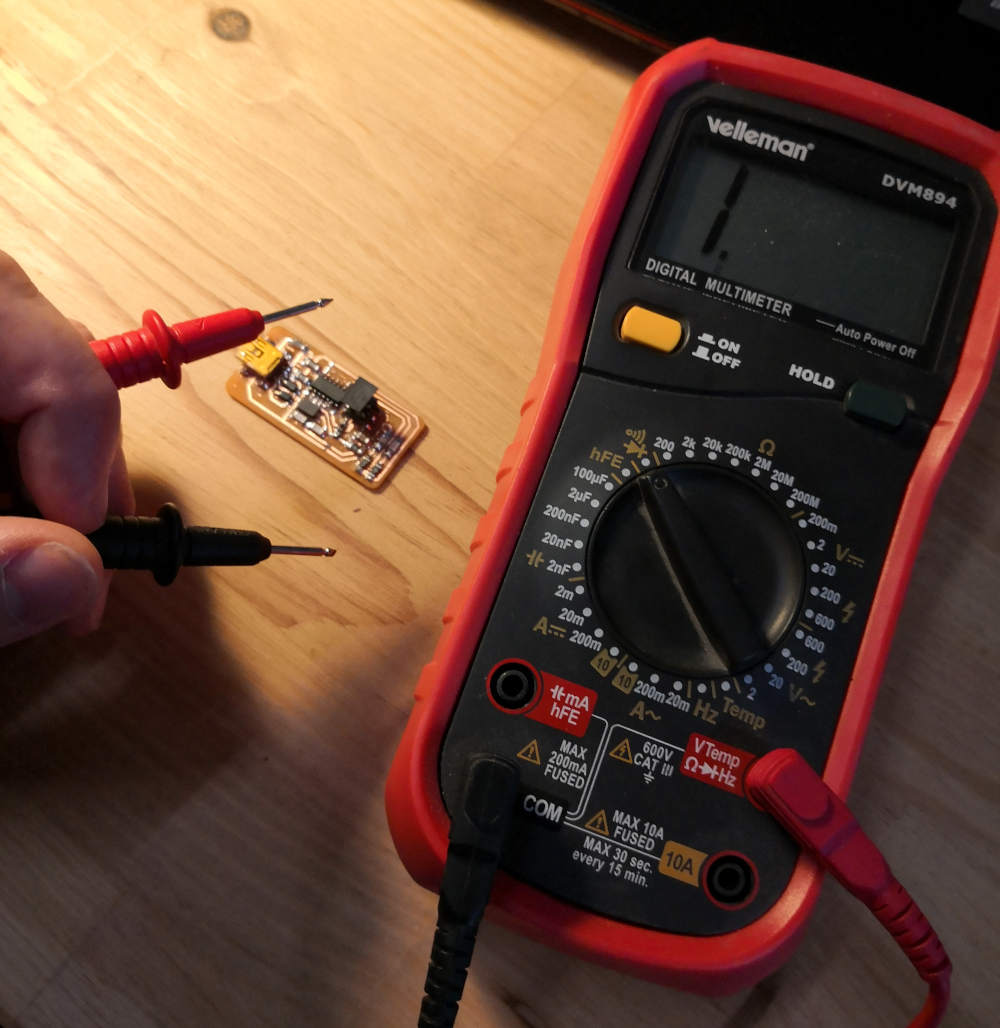
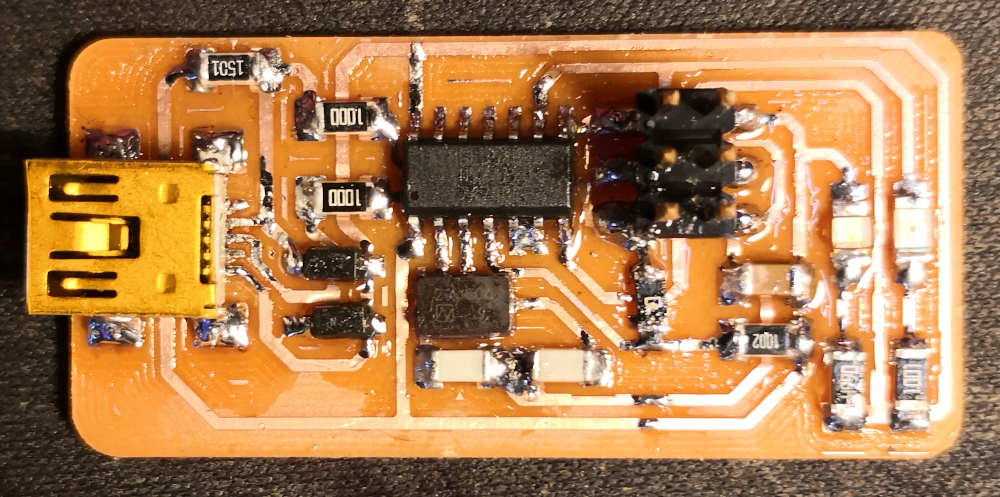
Ok not so bad. After soldering i eye check all the solder, nothing wrong apparently. go check with a multimeter.
Everything look in place. GREAT..
I connect it to my computer, the LED come Up. I'm happy.


Install
Warning all the following step are for a windows user not mac /linux.
Preparing the ISp programming by folowing the Anna Kaziunas & Eduardo Chamorro tutorial & the AVR toolchain on Windows 10 tutorial
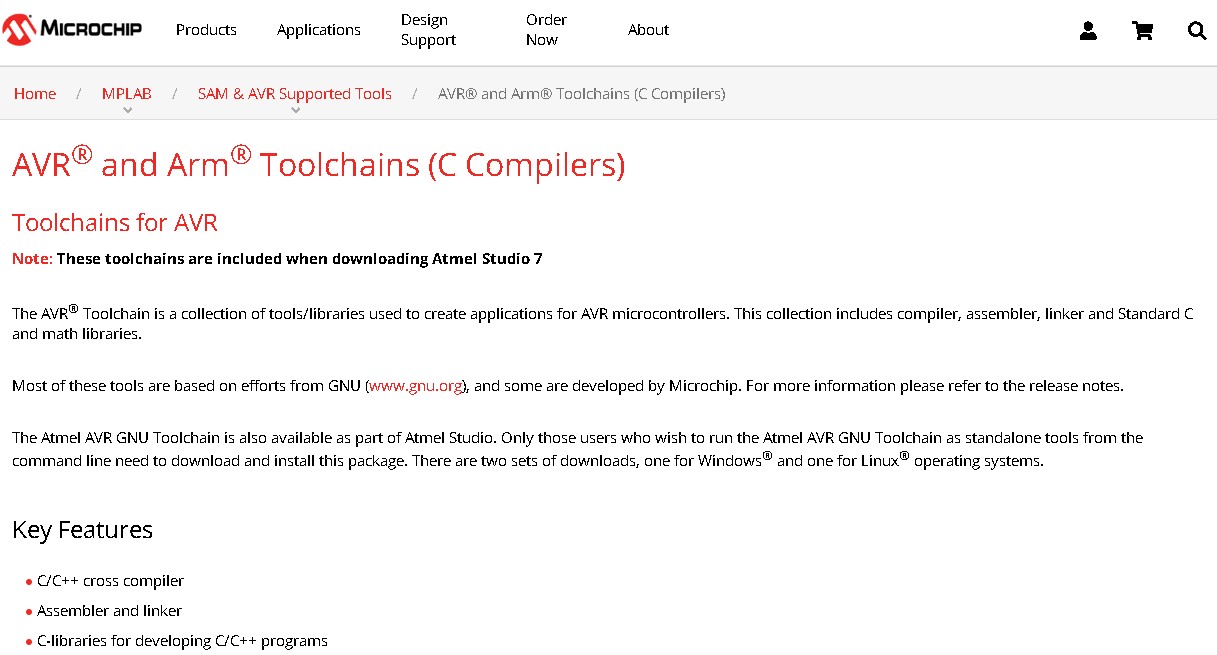
First going to Microship web site to dowload the toolchain & extract it.

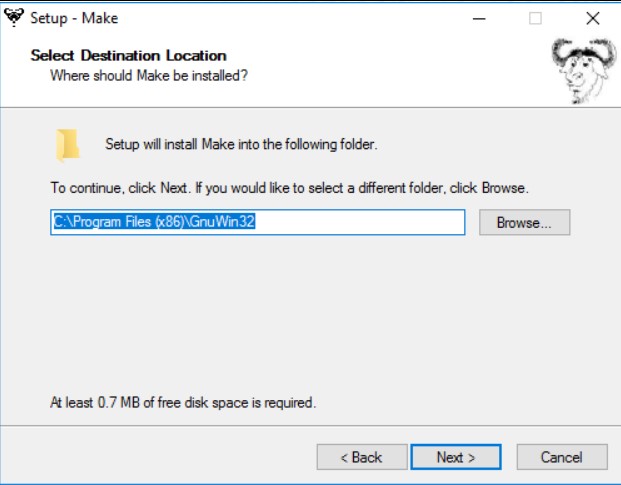
After i dowload GNU Make and use the launcher to install it.
Now i dowload, Unzip & copy the archive of AVRdude.
After this i need to tell Windows where is locate all the previously installed tools, if i want it's could work with command lines.
Lets go on Control Panel => System from the left panel, i choose Advanced System Settings and on the "Advanced" tab i click on the Environment Variables button.

Now selecte the Path variable & click on edit (If you don't have a variable called "Path" you could create it with New...)
On the "Edit" window add these 3 values:
- - C:\Program Files\avr8-gnu-toolchain\bin
- - C:\Program Files (x86)\GnuWin32\bin
- - C:\Program Files\avrdude
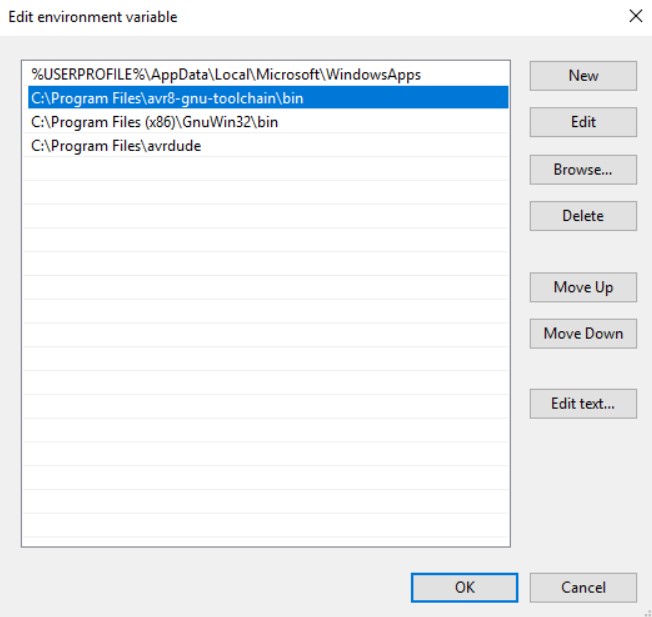
This Values is valid if you have installed your different parts in the default folder, if you installed in a other folder just change the folder ways.
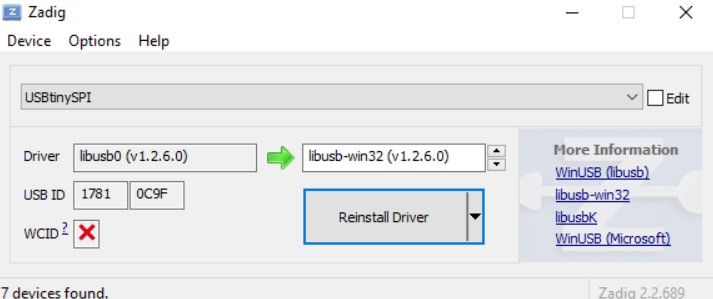
The USBtiny programmers use a generic libusb driver, but Windows 10's driver signing policy makes the installation more complicated.
Fortunately, there's a tool that helps with this. Download Zadig and launch it.
Plug in your programmer, and select the "USBtinySPI" device in the list. (If it doesn't show up, go to the Options menu and click "List All Devices".
The driver you want to install (to the right of the green arrow) is either libusb-win32 or libusb0. Click the "Install Driver" button. You should only have to do this once.
Now let's check if all the installation works, i start my GITBash and type the following instruction:
make -vif you get a "command not found" check your install of GNUMake or the Path setting typo.that's OK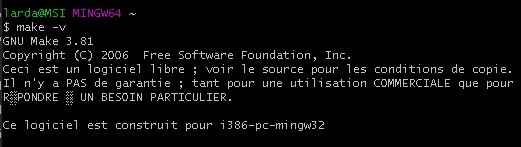
avr-gcc --versionIf you get a "command not found" check your install of the Atmel toolchain or the Path setting typo.that's OK
- Connect your progammer to a USB & type
avrdude -c usbtiny -p t45
This means that avrdude successfully found your programmer, but failed to talk to a target board (expected because we don't have anything conencted to the programmer right now.)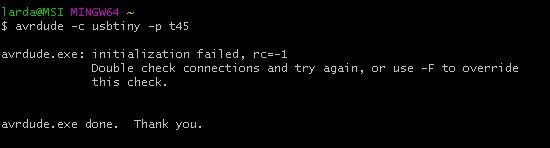
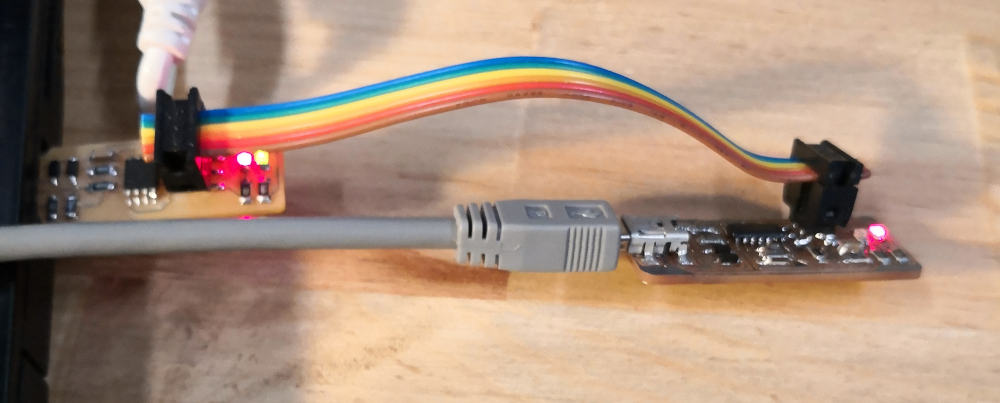
After cheking all the install, i plug my ISP on another fabISP, my computer don't want to recognize my boards...

Going Wrong:
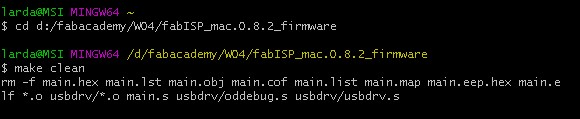
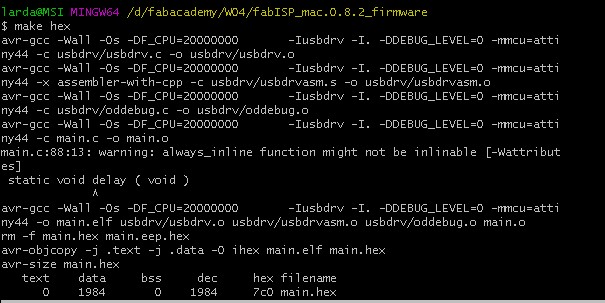
Using the Git bash, i do the make clean, the make hex without probleme.
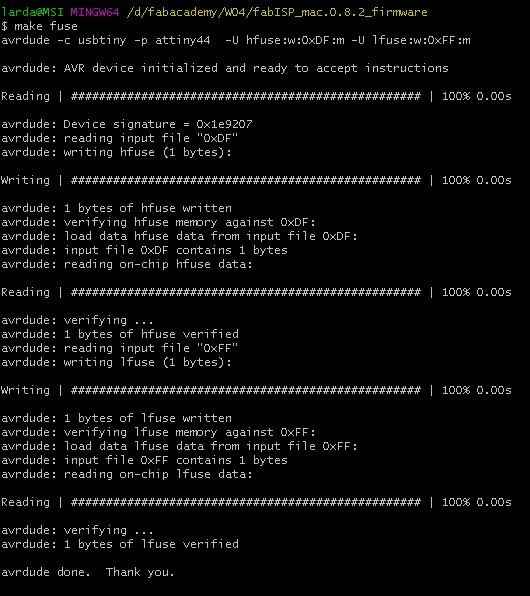
but not pass the make fuse step.

After many try, on my pc and on a linux OS with Jean-Baptiste, without result icheck again all my circuit & we don't see where is the probleme.
I change the Attiny for a new one using the hot air gun.
Don't work anymore.....
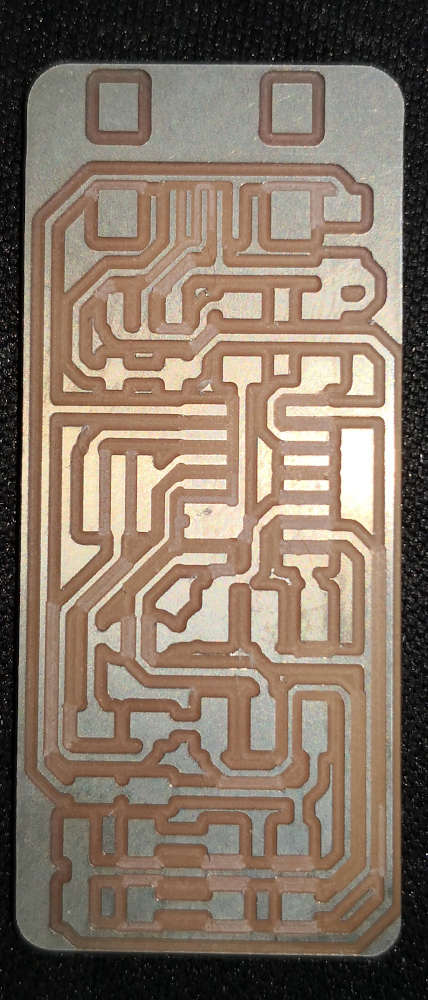
I modify my board traces for changing the cristal resonator.
Milling the new board.
Solder again.
Try to do all the make.
And.... Happyness no Error message appear.
But yet my board don't want to appear on any computer.... (26 february 2020 12h35)
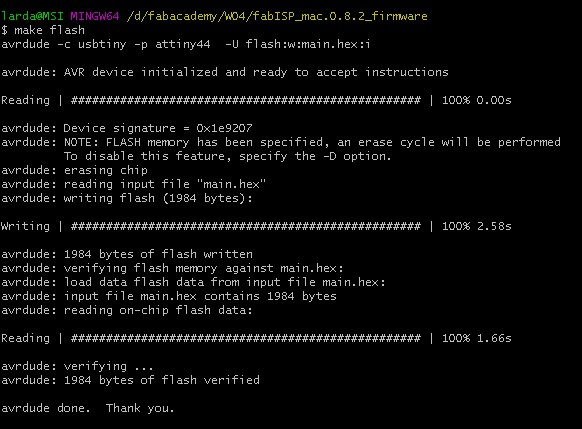
Did it !!!!!
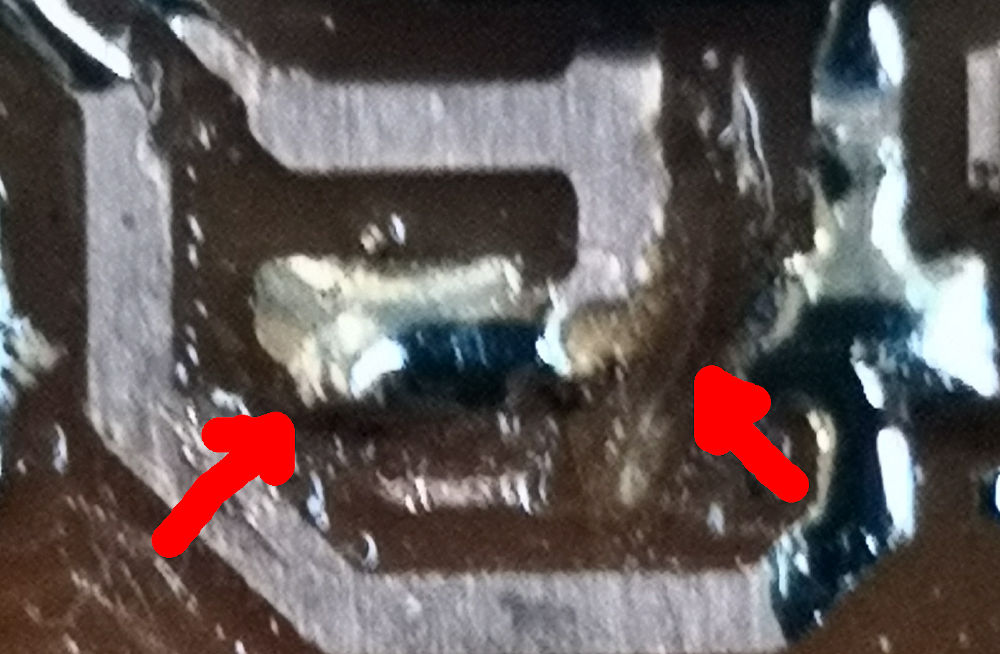
Last minute Update (26 february 2020 14h13, less 2 hours before reviews.....) after spend a lot of time don't understand why this "cute" board don't work (and after a small lunch),
i take my tinyISP in a "eyes to eyes" meeting, and here is the revelation.
Something strange appear to me.
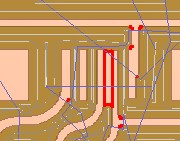
take the multimeter for double checking & yes. I have a short trace of copper the milling don't take away doing a shortcut. I take a blade and take it off.
Take again the multimeter, ok no more shortcut. Controll all the element and.....
Why i have a continuity signal inside one of my Zener diode....
take it off, and again i have tin making a short bridge, with a hairtick trace of copper, under the diode. cute it, sold the zener again, check and go try.
IT'S WOOOOOOOOORK